Monday, April 30, 2012

Rebecca Minkoff Mini Mac Nails.


As soon as I bought my Rebecca Minkoff Mini Mac clutch I knew I had to do a little nail art inspired by the bag. It's my new favorite accessory, and definitely suits all the neon manicures I've been loving for summer.


I painted my nails with China Glaze Shocking Pink which is almost the exact shade of the bag, and added chains to each of my nails with BM-12 and Sally Hansen Silver Sweep.


Sunday, April 29, 2012

Heartbeat Nails.

After a long weekend I decided I wanted a quick and simple manicure. I ended up choosing a cute heartbeat/heart rate design. 

I used Wet n Wild French White Creme as the base and painted the design on with Julep January.


Funky Eighties Nails.


Today's nails were really fun and bright, I was very happy with how they turned out. And they were pretty easy and not too time consuming since I didn't have to tape anything to make my lines.

The colors I used were China Glaze In The Lime Light and Wet n Wild Black Creme. I also used a Sally Hansen black nail art pen. For the pink lines I used neon pink acrylic paint and then added two neon polishes on top (CG Shocking Pink and CG Pink Voltage.)

And now for more pictures...


Saturday, April 28, 2012

Tie-Dye Nails Tutorial.

I was requested to do a tutorial for these tie-dye nails, so I quickly recreated a manicure with the same method. The video is really bad quality, but I think it gives you the idea! It's very simple, so I don't think the quality should hurt your understanding.


And here is the finished look...


I like how my middle finger turned out the most!

All the polishes I used were OPI. They are Don't Mess With OPI, Mermaid Tears, and Lucky Lucky Lavender.

Friday, April 27, 2012

Orly Nail Rescue Review.


I posted about buying Orly Nail Rescue back at the beginning of April, and now I've had a few chances to test it out so I wanted to let you know my thoughts. 

First of all, the process is basically fool proof. You brush on the glue, dip your nail in the powder, and then buff the area. It couldn't be more quick or easy. 

I haven't had a major break in any of my nails for a while (thankfully) but I've had a few cracks recently, so I used Orly Nail Rescue on them before they could get any worse. I tested the product out on a small crack on my thumb and another on my index finger. Both have been doing great, especially my thumb which was a bit worse. 

I'm extremely pleased with this product. It's nice not having to worry that if one of your nails gets a little break you'll have to cut them all down! 

Thursday, April 26, 2012

Purple Paisley Half Moon Nails.

I needed a manicure that wasn't too dramatic to wear tomorrow, and ending up deciding the best way to go was a little subtle stamping combined with a half moon manicure. I chose two purple polishes to use that are different shades, but not dramatically so, OPI Lucky Lucky Lavender and Sally Hansen Lively Lilac.

The paisley was stamped with Konad M60 and then I used paper reinforcements to easily add the half moons.


Other than drying time this was extremely quick and easy,  I'll have to try a more dramatic version sometime!

Tuesday, April 24, 2012

Queen of Hearts Nails.


Today's manicure was inspired by the Queen of Hearts from Disney's Alice in Wonderland. I did these nails for the Temptalia Disney Villains nail art challenge.

I wanted my nails to be an homage to the Queen of Hearts, but still be a bit subtle. I started with looking at images of the queen.


After a little contemplation, I decided the elements I wanted to capture in my manicure were her crown, the red roses, and the queen of hearts card.

The polishes I used were Wet n Wild Black Creme, OPI Don't Mess With OPI, Sally Hansen Whirlwind White, Julep January, American Apparel Port, and LA Colors Wave Length. I did the roses using acrylic paint.

I played around with ways to do roses for this manicure and ended up going with something a little different than my typical rose manicure. I really like how they turned out.


Monday, April 23, 2012

Paint Splatter Nails.

Sometimes when I'm doing a manicure I set out with a design in mind and pick colors accordingly, other times I begin with a color and work from there. For this manicure I started with a color, OPI Yoga-ta Get This Blue! I bought this polish after Christmas and haven't used it very much yet. It's really pretty though. It reminds me of OPI Ink if the shimmer was blue. From there I decided I wanted to do paint splatter nails. These are a really easy design, and it makes a really nice french manicure type design that doesn't scream french manicure.


The paint splatters are done in Sally Hansen Brisk Blue and Color Club Lumin-Icent. Lumin-Icent looks very silver in the photos (and in person at times) but it actually is a very pale ice blue. Perfect for bringing out the shimmer in the base color.


Sunday, April 22, 2012

Fun Leopard Nails.

Leopard print nails used to be one of my go-to designs, but this was my first time doing it on my own nails in a few months.


I saw this leopard print shirt and had to do nails inspired by it.


The colors I used were CND Flashpoint, Sally Hansen Brisk Blue, American Apparel Office, and American Apparel Neon Yellow mixed with Sally Hansen Lickety-Split Lime. The base color is Wet n Wild French White Creme. The stamping was done with Konad M57 and Konad Special Black polish.


Saturday, April 21, 2012

Rubber Duck Nails.

I saw a rubber duck design on youtube when I was looking for a fun freehand design to try out and knew this would be perfect.

I painted all of my nails Essie Sweet Talker. Then I made the rubber duck with CND Yellow Bicycle, and did the nose with CND Electric Orange. The eye is Wet n Wild Ebony Hates Chris and Wet n Wild French White Creme. Then to create the bubbles I mixed French White Creme, Sweet Talker, and Sally Hansen Brisk Blue. For a finishing touch I covered the bubbles in Wet n Wild Blue Wants to be a Millionaire, which has a sheer blue base and holographic shimmer. 


At first I tried adding bubbles to the rest of my nails, but I ended up deciding I liked the one accent nail on it's own and repainted the rest of my nails.


I think the duck turned out super cute!

I'm pretty sure this is the only way to end this post...


Friday, April 20, 2012

Minnie Mouse Nails.

I love doing manicures using dotting tools and Minnie Mouse nails are perfect for that.

All of my fingers except the accent nail are painted with Julep January. As I've mentioned I don't typically wear red, but this is a nice color with a classic feel to it. My accent nail and the white dots are Sally Hansen Whirlwind White. The Minnie heads were done with Wet n Wild Ebony Hates Chris, and then I added bows with January.


I wasn't originally planning to add the bows, but I think they were a nice finishing touch to pull everything together.


I've been wanting to do this manicure for a while and I'm very happy with it, it came out better than I was expecting!

Thursday, April 19, 2012

Peacock Feather Nails.

I haven't been stamping as much lately, so I decided to break out one of my favorite plates for a peacock manicure.

The plate I used is Bundle Monster BM-212. The base color on my nails is Wet n Wild SaGreena the Teenage Witch with Wet n Wild Teal or No Teal layered over top (this looks more green in person.) I stamped using Sally Hansen Color Quick Gold Chrome. And then the details were added with OPI Ink and Wet n Wild Teal of Fortune.


I've done this design in the past (months and months ago) but I like it even more this time. I think it's because I'm very happy with the shape of my nails at the moment!

Wednesday, April 18, 2012

Teal Wave Nails.

I love how simple and fun today's nails are.

I used OPI Mermaid Tears and Ski Teal We Drop. I did the design using tape and Kodak Craft Scissors (the pattern is called Deckle.)


No matter how many photos I took Ski Teal We Drop photographed a lot more blue than it actually is. It is much darker in person. Mermaid Tears photographed very realistically though.


I think I need more scissors with fun patterns!

Tie-Dye Stamping Tutorial.

Stamping doesn't always give you a ton of artistic freedom, but it's still a way to get a lot of great designs. However, there are a few ways you can make a stamped manicure more interesting. One of them is to stamp with multiple colors and create a fun tie-dye effect.

Here is an example of a manicure done using this technique. The bright tie-dye combined with the butterfly print is perfect for spring and summer!


Getting a manicure like this is super simple, especially if you already know how to stamp. Paint your nails your base color (I used Wet n Wild French White Creme) and let  it dry completely.


Now get everything ready. Timing is key in stamping, and using multiple polishes does take a little longer. Have them all open and ready to go, and your plate out. I used a peace sign design from BM07.


Now all you have to do is use the brush from the polish bottles to put dots of the different colors onto the design in random places. There doesn't need to be any rhyme or reason to it.


And then scrape and stamp as usual! Follow with a thick topcoat like Seche Vite.

Now for the finished design...


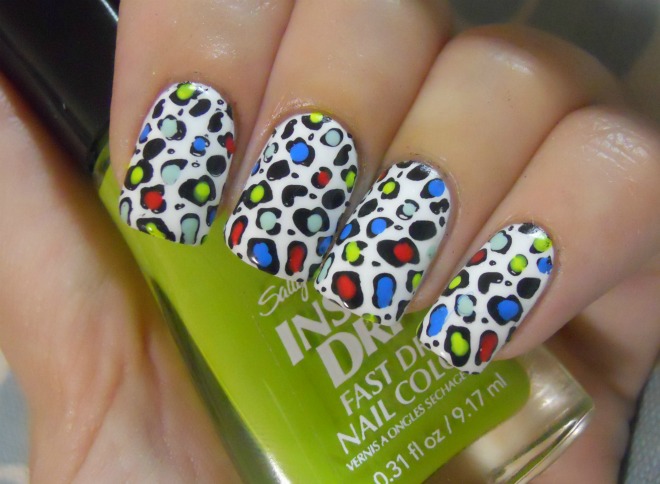
The stamping colors are Sally Hansen Lively Lilac, Brisk Blue, and Lickety-Split Lime.

Let me know if you try stamping this way!